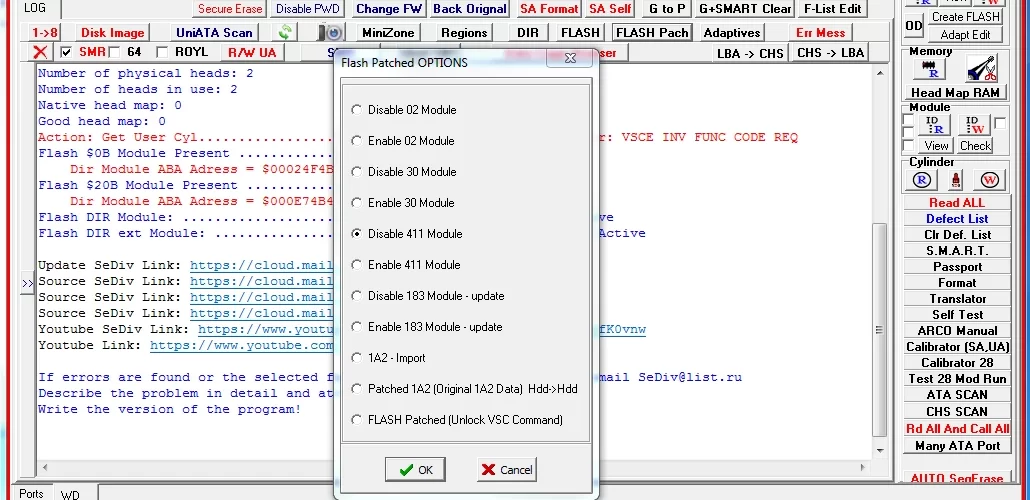
What “Disable 411” Means in SeDiv Software
According to documentation on the firmware behavior of certain Western Digital (WD) hard drives, SeDiv utilities provide a specific function called “Disable 411 module”, which is used to work around firmware or busy-status issues:
• This option appears in scenarios where:
• The disk remains stuck in a busy status and cannot become ready.
• The disk becomes ready but then gets stuck again when trying to read or write.
• You need direct access to the drive’s system area to modify firmware and resolve the long busy-state condition.
• Previous methods included disabling the system area entry or triggering defects so that the loader (LDR) could load and allow read/write access—but these do not always work, especially on newer drive models.
• The SeDiv “Disable 411 module” is a newer and more effective method, specifically designed for WD drives that include a firmware module identified as “411.” It’s better suited for modern drives when older tricks fail.
⸻
General Steps to Use “Disable 411 module” in SeDiv
Here’s a summarized workflow based on the documentation:
1. Prepare the drive
• If the drive is unresponsive or stuck in busy status, short-circuit certain pins or apply jumpers (as per SeDiv guidelines), then power on the drive.
2. Activate the function
• Once the drive is in a ready state, open the SeDiv WD utility and click the “Flash Pach/Disable 411 module” option.

• A new ROM has been created in the framer path and the user must burn the new ROM according to the file posted on the site.
3. Cycle power
• Power the drive off, remove any jumpers if they were used, then power the drive back on.
4. Re-access via SeDiv
• Once the drive becomes ready again, re-open the SeDiv. You should now have direct read/write access to the drive’s system area, facilitating firmware repair or modification.
